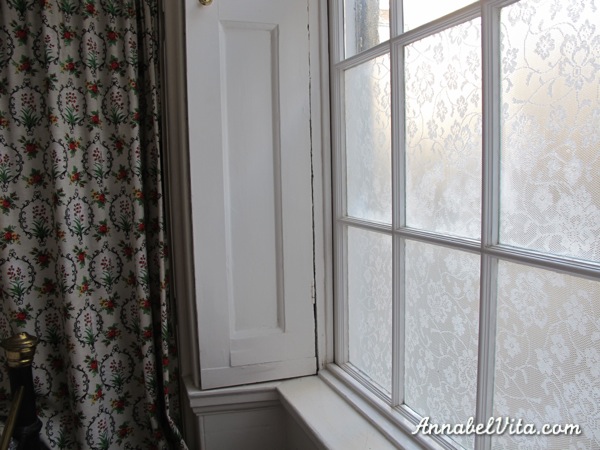
Oh my goodness, this was the quickest, easiest, cheapest project ever but I’m 100 per cent in love with the results. You know those little upgrades that just make your life both better and prettier? This is one of those for our bedroom.
So, privacy. This bedroom has delectable shutters, which I adore, but it makes window treatments kind of hard. You either have to hang curtains in front of the whole alcove (we can tell by the holes in the trim that this is what our predecessors did) or not at all. For the last year and a bit, we’ve opted for the latter option, except for a tension rod light blocking curtain above the shutters.

The shutters are great at blocking all natural light, which is great for lie-ins. But, this room gets crazy beautiful morning light and it always seemed a shame to be getting dressed in artificial light just for privacy.
Anyway, the other day I was browsing the Manhatten Nest blog (looking for something else entirely), when I stumbled on this post of yore about using liquid starch and fabric for privacy in glass windows. Boom!
Obviously, my mind went straight to lace (because my mind always goes straight to lace) and I thought ooh, I gots to try that out one day!
Serendipitously, we headed to Ikea earlier in the week to scope out tea-light lanterns for the wedding. Even more serendipitously, Ikea has JUST started selling lovely scallop edge lace fabric for a mere £1.50 per metre. Boom boom.
Anyway, I got home from work one day and mixed up the starch jelly. I ended up mixing 2 tablespoons cornflour (that’s cornstarch across the pond) with about an equal amount of cold water, then mixing that in about a cup and a half of boiling water from the kettle. I mixed it in a lunch box and the resulting jelly is both spooky and somewhat non-newtonian.
(Random interlude – my first lady boss once told me that some men – ie. our coworker at the time – are like custard powder mix – the more you stir them the more they resist, so keep a light touch. It’s been remarkably useful advice and obviously applies to lots of women too!)
Unlike Daniel, I didn’t soak my fabric in the mix. It just felt like a messy and icky idea so instead I painted a thick layer of gloop on to the window pane.

Then I cut out a rectangle of lace using a template I’d made earlier. I didn’t iron it first but the one piece I had where there was a crease was the hardest to apply so do iron your fabric if it’s creased at all.
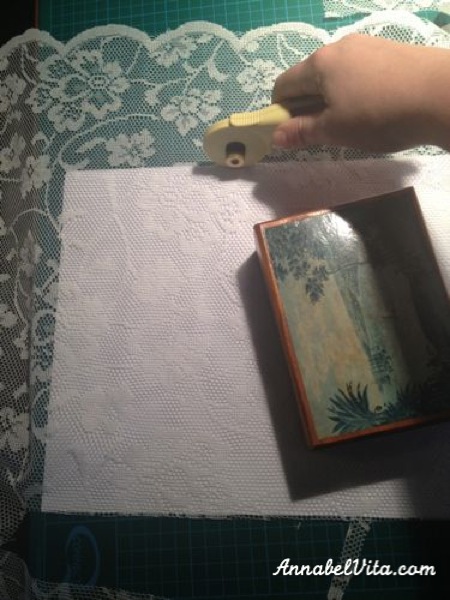
Then I applied another thick layer on top, being sure to get it right into all the corners. I tried working top to bottom, centre to corners and a few different ways, but there wasn’t a noticeable difference in ease or result. I did notice that there were sometimes brush marks if I did it too regimented so I ended up going for random patterns of brush strokes.

The best thing about using lace (with holes in) is that there are automatically not air pockets so you don’t have to both squeegeeing them out, which is good because I’m really bad at that sort of thing. The other good thing about lace is it’s very forgiving. On one pane, I ended up with a gap in one place, I just cut a small strip and starch-glued it over the top. I can’t even tell where it was now!
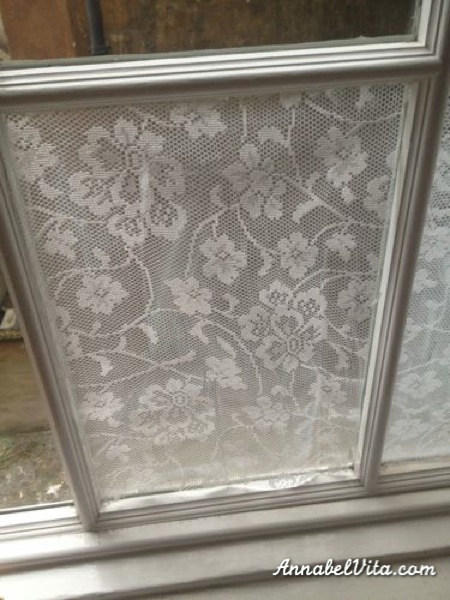
Et voilà! Done. This took less than an hour from start to finish.

Except I’m going to go back and add a row of scallops in the panes just above it. But I figured if I waited to post about it until I’d done that then I’d probably never post about it.

The best thing about this is that to remove it, you just wash it off with warm water, so it’s perfect for renters. My other favourite thing, that doesn’t really show up in pictures, is that it keep the texture of the lace, so it doesn’t look like fake lace contact paper.
I noticed Dan got a lot of comments wondering if this could be done in a hot, humid room like a shower. To that, I’d say it wouldn’t work somewhere that gets directly wet. As for humidity, it probably depends just how humid, but this is so cheap (£1.50 of fabric, probably less than a penny worth of cornflour) and easy to install and uninstall that you should just give it a go and let the internet know how it works out!
I would say it’s probably not great for a window that would get dirty a lot (like above a sink) because you probably can’t wipe it down. If this window gets dingy, I’d probably remove all the sheets and run them through the machine in a lingerie bag. It’s that easy to apply.
Hopefully I’ll get the scallops up soon and will post back about those!
PS. To see the stunning view this is blocking, click here.
UPDATE! I added a few more details and answers to common questions on a new blog post. Read all about it here.
PPS. Click here to see an update for how I removed it after six or so months.
If this was helpful feel free to buy me a coffee at https://ko-fi.com/itsannabelvita

