Wedding bits and pieces

Wedding invitations!

Hello friends, remember that wedding I’m planning? I thought it was time to talk about it again on the old blog!

First up, I though I’d share our absolutely stunning wedding invitations, drawn and painted for us by a very dear friend (the one who introduced us, no less).

We wanted something beautiful but unfussy, which is how I hope the whole wedding will feel.

Here are the inspiration images I sent her…

Invite inspiration collage(Sources: thank you cards, top right invitation, swallows, paint palette, table cloth, bottom left invitation)

And here is the stunner she sent back to us…

Wedding invitation - green blurs

(I’ve blurred the date just because if these leave my blog for any reason then I feel like I’d rather keep that on the down low)

Aren’t they gorgeous? I feel like she really took the soul of everything I liked and turned it into something totally different and totally us. She’s very talented.

The back of the invite has an incredible map made by another of our friends (a professional cartographer! we’re very spoilt I know), but I didn’t think I could share anything worth sharing about that while still keeping our privacy safe. I did cut out and paste the swallows from the front onto the back along with some of the flowers so it all matched.

invites on gingham with blurs final.jpg

We had them printed by moo.com (postcard size) and popped them in some lovely “heritage green” envelopes, which we adorned with a swallow stamp from this lovely Etsy shop and a stamp with our address that we got free from Vistaprint. Inside was a simple slip with some questions for people RSVPing and details of our wedding website.

Me-Made-May’2013

20130501-221851.jpg
Me-Made-May is a big challenge on the stitching community, set up by SoZo. The idea is to challenge yourself to wear as many homemade clothes as possible.

When Me-Made-May happened last year, I was just getting into making clothes and thought for sure by this Me-Made-May I’d be all set!

But I’m not, really, I fell into the classic novice crafter error of over-committing on sewn Christmas presents, and then friends had birthdays and babies and I fell down the wedding sewing rabbit hole (bunting and table cloths, no dresses).

Hot pink floral sorbetto

Long story short, I haven’t sewn anything for myself in well over six months, and my total home made wardrobe thus far consists of two dresses, a skirt and a top (I’ve also made a dress and a top that are not wearable.) I don’t love one of the dresses or the skirt, but I plan to do a dye job and maybe a little nip and tuck… I’ll report back on this.

simplicity 1800 amazing fit dress

With just over six weeks to the wedding, I’m trying to be realistic that I won’t be making any beautiful (or otherwise!) dresses this month, much as I might want to.

sorbetto sundae dress

But! The challenge is meant to be, well, a challenge and so despite this paltry collection of outfits (all pictured here!), I have signed up. My personal pledge is to wear a home made garment three times a week.

I’ll be instagramming my wears (@annabelvita) and will post a round up of all the different outfits at the end of the month.

Happy May, one and all!

Lace window treatment with cornflour

Lace cornstarch window treatment10Oh my goodness, this was the quickest, easiest, cheapest project ever but I’m 100 per cent in love with the results. You know those little upgrades that just make your life both better and prettier? This is one of those for our bedroom.

So, privacy. This bedroom has delectable shutters, which I adore, but it makes window treatments kind of hard. You either have to hang curtains in front of the whole alcove (we can tell by the holes in the trim that this is what our predecessors did) or not at all. For the last year and a bit, we’ve opted for the latter option, except for the tension rod light blocking curtain above the shutters.

Lace cornstarch window treatment05

The shutters are great at blocking all natural light, which is great for lie-ins. But, this room gets crazy beautiful morning light and it always seemed a shame to be getting dressed in artificial light just for privacy.

Anyway, the other day I was browsing the Manhatten Nest blog (looking for something else entirely), when I stumbled on this post of yore about using liquid starch and fabric for privacy in glass windows. Boom!

Obviously, my mind went straight to lace (because my mind always goes straight to lace) and I thought ooh, I gots to try that out one day!

Serendipitously, we headed to Ikea earlier in the week to scope out tea-light lanterns for the wedding. Even more serendipitously, Ikea has JUST started selling lovely scallop edge lace fabric for a mere £1.50 per metre. Boom boom.

Lace cornstarch window treatment08

Anyway, I got home from work one day and mixed up the starch jelly. I ended up mixing 2 tablespoons cornflour (that’s cornstarch across the pond) with about an equal amount of cold water, then mixing that in about a cup and a half of boiling water from the kettle. I mixed it in a lunch box and the resulting jelly is both spooky and somewhat non-newtonian.

(Random interlude – my first lady boss once told me that some men – ie. our coworker at the time – are like custard powder mix – the more you stir them the more they resist, so keep a light touch. It’s been remarkably useful advice and obviously applies to lots of women too!)

Unlike Daniel, I didn’t soak my fabric in the mix. It just felt like a messy and icky idea so instead I painted a thick layer of gloop on to the window pane.

Lace cornstarch window treatment01

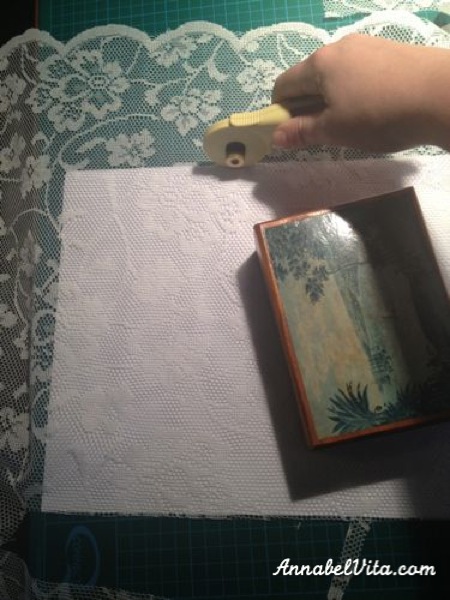
Then I cut out a rectangle of lace using a template I’d made earlier. I didn’t iron it first but the one piece I had where there was a crease was the hardest to apply so do iron your fabric if it’s creased at all.

Lace cornstarch window treatment04

Then I applied another thick layer on top, being sure to get it right into all the corners. I tried working top to bottom, centre to corners and a few different ways, but there wasn’t a noticeable difference in ease or result. I did notice that there were sometimes brush marks if I did it too regimented so I ended up going for random patterns of brush strokes.

Lace cornstarch window treatment02

The best thing about using lace (with holes in) is that there are automatically not air pockets so you don’t have to both squeegeeing them out, which is good because I’m really bad at that sort of thing. The other good thing about lace is it’s very forgiving. On one pane, I ended up with a gap in one place, I just cut a small strip and starch-glued it over the top. I can’t even tell where it was now!

Lace cornstarch window treatment03

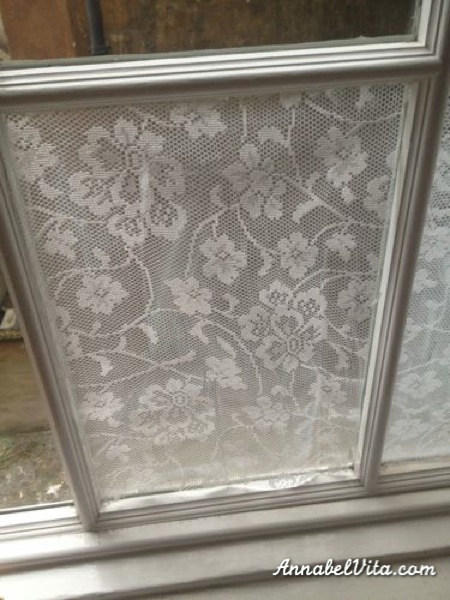
Et voilà! Done. This took less than an hour from start to finish.

Lace cornstarch window treatment13

Except I’m going to go back and add a row of scallops in the panes just above it. But I figured if I waited to post about it until I’d done that then I’d probably never post about it.

Lace cornstarch window treatment12

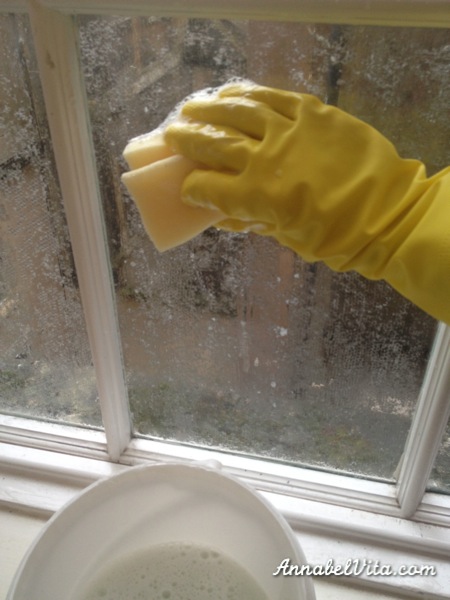
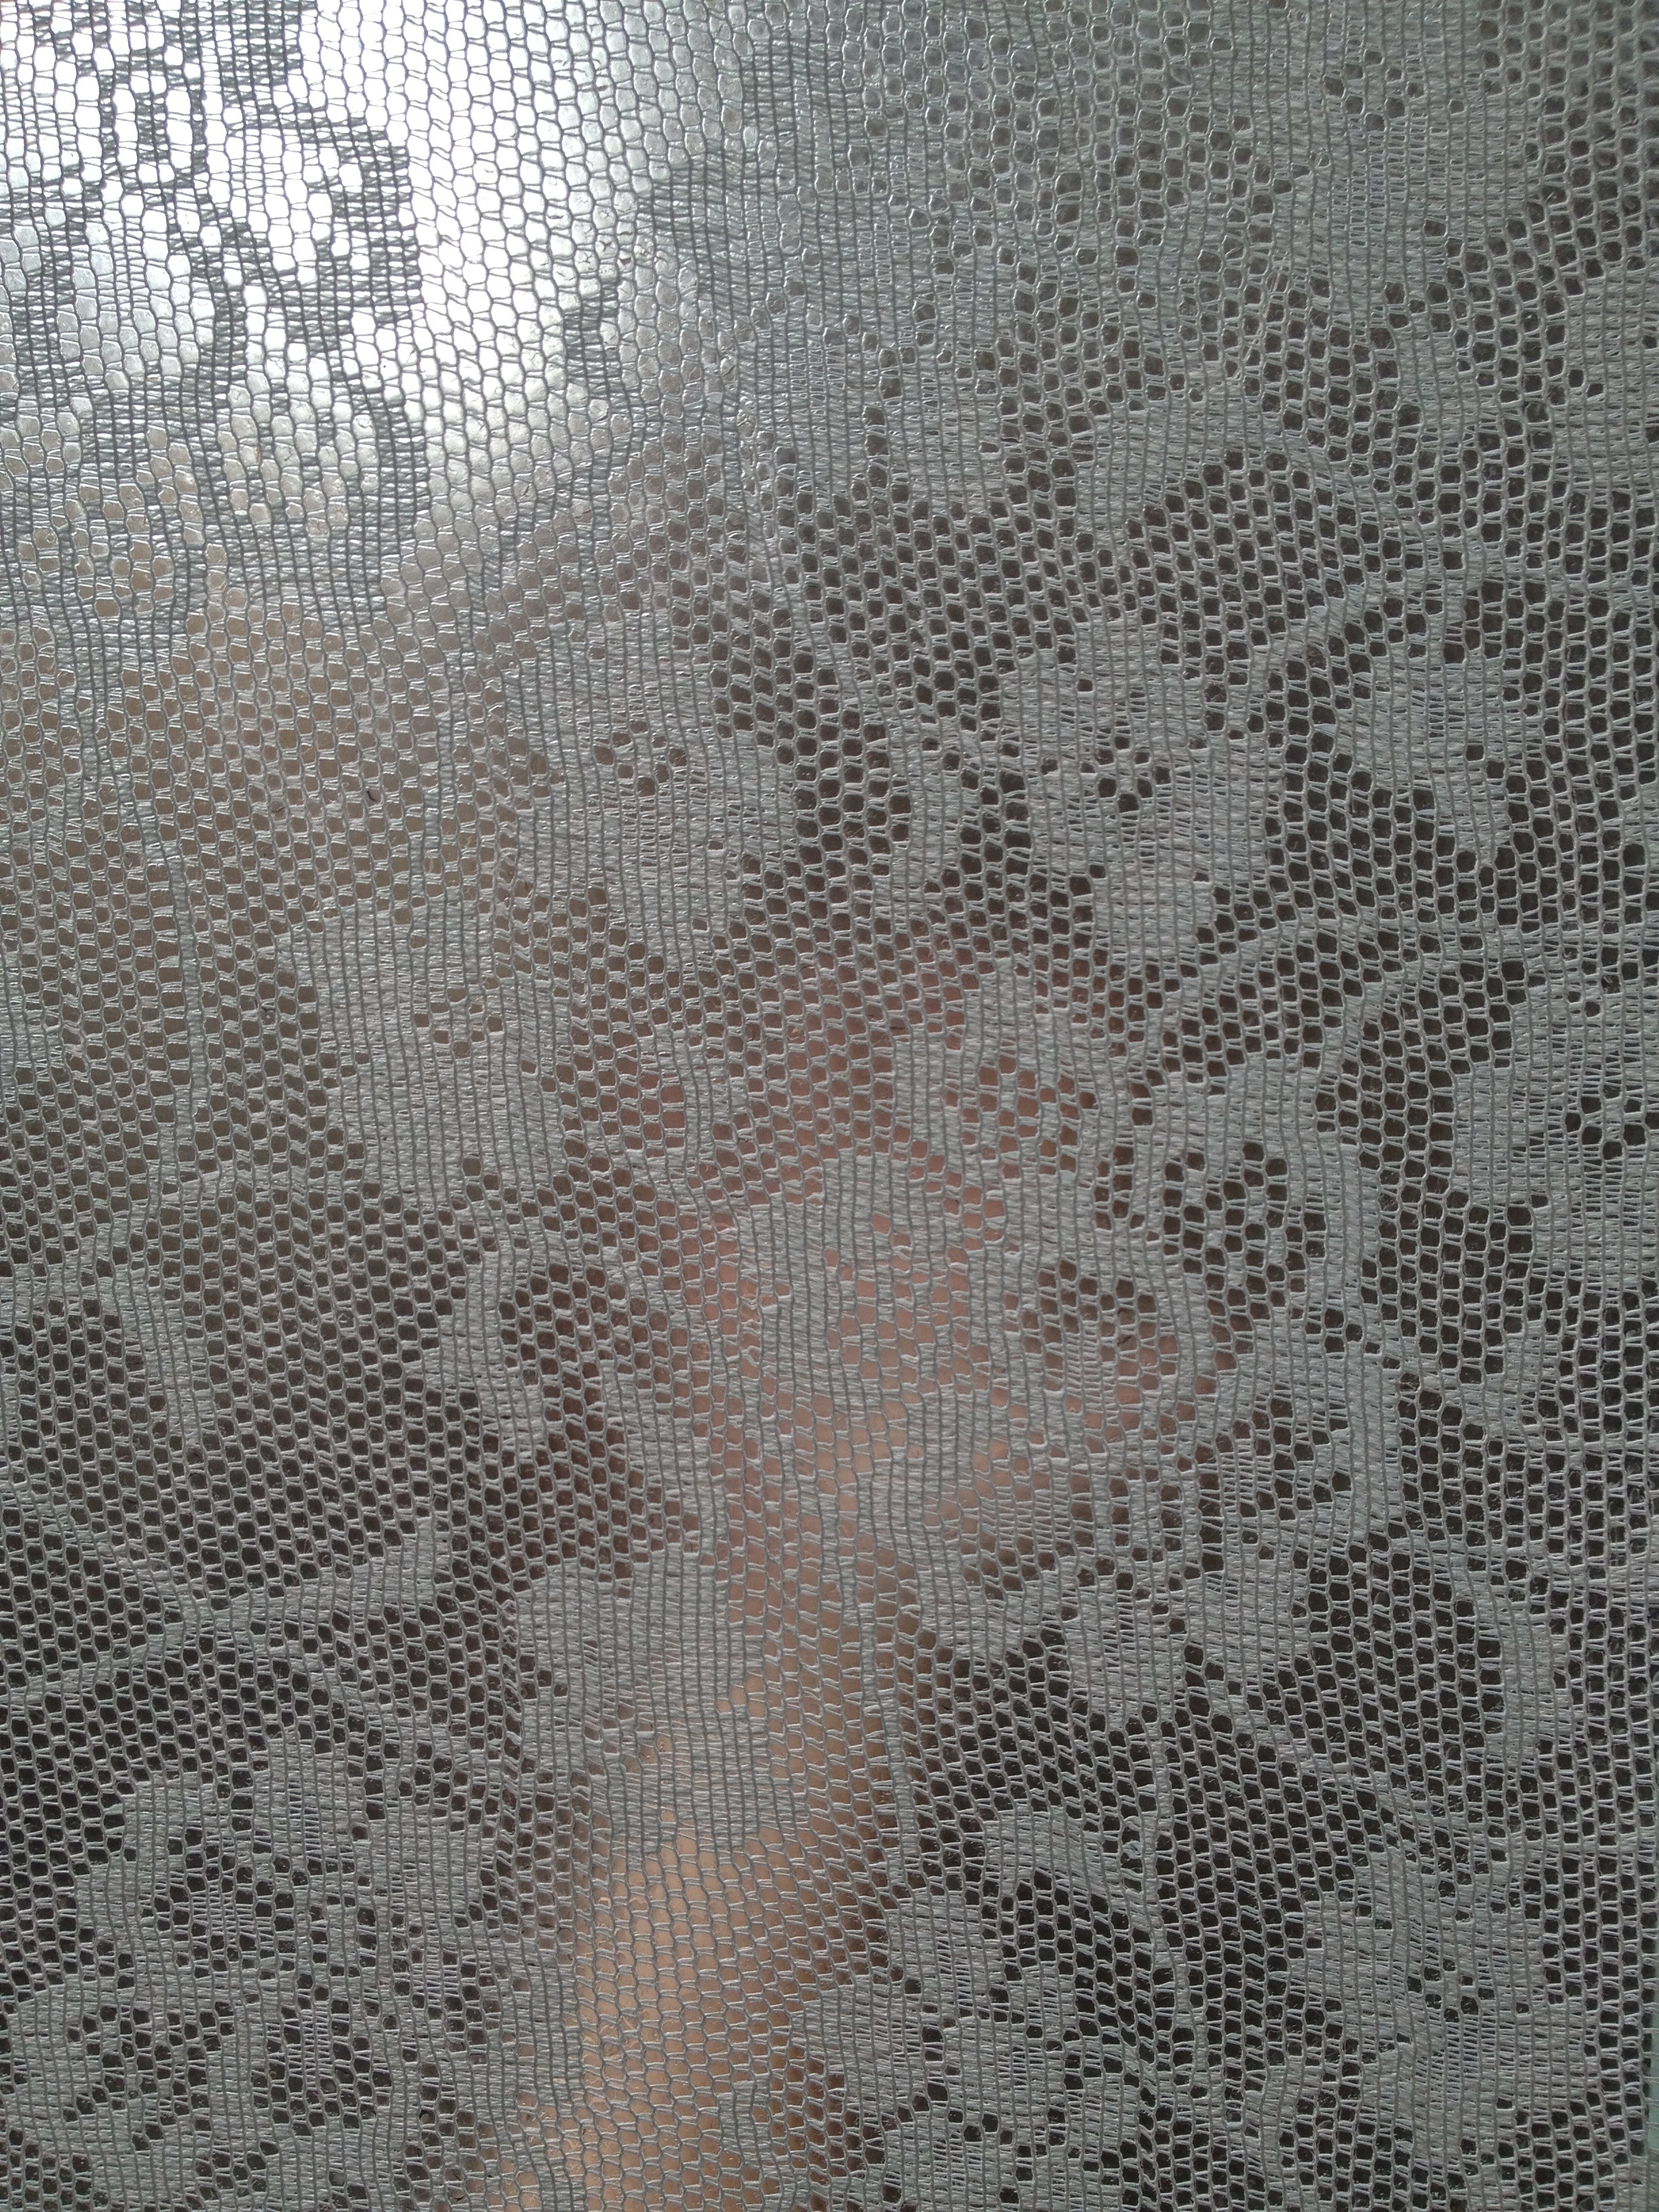
The best thing about this is that to remove it, you just wash it off with warm water, so it’s perfect for renters. My other favourite thing, that doesn’t really show up in pictures, is that it keep the texture of the lace, so it doesn’t look like fake lace contact paper.

Lace cornstarch window treatment07

I noticed Dan got a lot of comments wondering if this could be done in a hot, humid room like a shower. To that, I’d say it wouldn’t work somewhere that gets directly wet. As for humidity, it probably depends just how humid, but this is so cheap (£1.50 of fabric, probably less than a penny worth of cornflour) and easy to install and uninstall that you should just give it a go and let the internet know how it works out!

I would say it’s probably not great for a window that would get dirty a lot (like above a sink) because you probably can’t wipe it down. If this window gets dingy, I’d probably remove all the sheets and run them through the machine in a lingerie bag. It’s that easy to apply.

Hopefully I’ll get the scallops up soon and will post back about those!

PS. To see the stunning view this is blocking, click here.

PPS. A few more pictures

Lace cornstarch window treatment14

What if animals were round?

Happy Friday! This is a totally randumb post but this video made me laugh so much I had to share!

Click here to see the embedded video

I’m curious – what’s your favourite animal?

Oh! In fact – what are your top three and why?

The bedroom

bedroom 1

When you walk into our flat, the doorway to our bedroom is the view that greets you on the right. It’s also what you see from the sofa if you turn your head to the right down the hall.

Our bedroom is teeny. Our bed has to be pushed up against the wall. There’s a tiny cupboard (seems to me like an average American hall linen cupboard) and no room for a wardrobe. But, it’s filled with light and has a huge lovely window.

bedroom 7

That green curtain at the top is green ikea fabric plus a closet rod.
Mr V had to risk his life to put it up (it’s a 11 foot high and he got
it up by climbing the window frame), but it’s worth it to not get
woken up by the light as soon as it’s up.

I’ve decided it’s time to love it exactly as it is. We’re nearly-newlyweds, living in a teeny flat is par for the course! My future-mother-in-law was telling me that their newlywed flat had huge gaps between the floorboards that let in freezing cold air and they’d get ice on the inside of the windows. It’s okay! We’re still just starting out our lives together.

The whole flat looks nicer with the bedroom door open (because then light is coming in from both directions), so our bedroom is a lot more “public” than it would be in some other flats. This makes me pleased that we’ve been able to sort out the hot mess that the bedroom used to be.

Screen shot 2013-04-11 at 3.51.14 pm


Before > After (I’d hope that was obvious!)

Ah, that’s better! I’ve written before about adding the rast dresser, but the garnityr hanging clothes cover has really helped hide even more clothing clutter from view.

bedroom 9

But the real reason I wanted it was that our clothes were getting crazy dusty. I don’t know if it’s the high ceilings or the fact we’re living in the city centre (beside a pretty busy road) but this flat has more dust than anywhere I’ve ever lived. You can dust, turn your back and it’s covered in thick dust again.

bedroom 3Drats, everything moved slightly in a recent shuffle and I forgot to recentre this poster!

bedroom 8

That bluey thing you can see down the side is an Ikea hanging storage thing that I can’t find on their website,  where I keep my tights, belts and slips. Mr V’s work shirts don’t get dust protection because they get worn and washed weekly, which is just enough to keep them clean out in the open!nook


Oh weird nook, you are weird. I would love to make a feature of you but I need you for storing underwear, art we don’t have room for anywhere else, Mr V’s grandma’s handbag, a knitted rat muskateer and the homemade chewbacca I sewed for Mr V. Those hooks I added under the overhang are handy for worn-but-not-dirty clothes and the lint roller. I painted that mini chest of drawers in those two colours as swatches for something else, but ended up liking the way it looked just like that!

bedroom 6

Favourite map and curtain bought for €1 a few years ago are both from French brocantes (long before we moved to this flat). Globe lamp shade from a local toy shop! Badly made bed courtesy of the fact it’s up against a wall and our duvet has lost all its poofiness.

bedroom 5

See? No poof. Sad duvet. This picture also shows our incredibly handy tall and narrow tables (one is tucked under the other). I bought both of these for £4 when we were first moving in together and they’ve been endlessly useful as we live in these tiny flats. I may give them a lick of paint one day (the tops are all kinds of cruddy) but they do an okay job of hiding their flaws (and I like that they’re already ruined so it doesn’t matter if I spill water or coffee on them). bedside tbaleIkea lamp, bunny night light (the best for late night toilet trips), five year diary, pens, Anthopologie catch-all bowl. This picture illustrates how tight a fit our bed is in this room! Also, check out that lovely molding. I still need to show you the original (1745!) molding in the front room, it is ridonkulous (about three times the size of this!).

And that brings us to the end of this little room tour. I hope you liked it. The room is too small and has been too cold all winter, but I do love it. The light is incredible and those silly-high ceilings keeps it from feeling pokey or claustrophobic. Plus, we’re only young. There’s plenty of time for bigger bedrooms!

For now we love where we live enough to deal with the compromises. (Enormous living room means all the other rooms are tiny. Location makes us so, so happy. The rent is really, really affordable.) I’ve been idly looking for our next place (one where we could get a dog) and none of them have anywhere near as good a balance of size, location and cost that our flat has, despite the many downsides of this place.

I guess it’s like anything else, it doesn’t have to perfect to be perfect for you in the here and now.

New Home 611 sewing machine review and manual

Sewing table

Do you ever post something just because before you did it / learnt it you couldn’t find it on Google? Well, this post is one of those posts. I love my sewing machine but there is NOTHING out there about it and I wanted to remedy that, in case anyone in the same situation I was two years ago (in a charity shop, googling a review of a sewing machine to see if they should buy it or not!) Sorry that this post will be boring for most of you… I’ve put everything behind a jump to make it easier to skim!


New Home 611 sewing machine manual

So, without further ado, after the jump you’ll find my review of my New Home 611 sewing machine and pictures of every page of the manual. (One day I’ll photocopy the manual into a PDF, but that day is not today, too lazy.)

read more »

Birthdaylovin and bloglovin

Follow my blog with Bloglovin

Thank you everyone for the birthday wishes on instagram yesterday! I realised after I posted that it was a shameless plug for attention, but I promise my intention was only to show you the lovely cakes and mug that Mr V gave me!

20130315-102435.jpg

I had a really lovely day off for my birthday – in the morning I went to the florist with my mum, armed with Jess’s mom’s tips! The florist was amazing and I’m so excited about our flowers now. All the details are falling into place!

I had lunch and a glass of prosecco with Mr V in the sun (a rare sighting, especially for my birthday!) and we went to Ikea in the afternoon, which I thoroughly enjoyed.

20130315-102522.jpg

And then in the evening my Mr V, my mum, friends and I went out for a meal at an amazing restaurant three doors down from my house. It was the first time we’d been so we were thrilled to discover that not only was it yummy, but they also do takeaway! After dinner, everyone popped back to our flat for a slice of gorgeous cake and a round of Happy Birthday.

20130315-102452.jpg

A very Happy Birthday, indeed!


Anyway, the real point of this post was to ‘claim’ my blog on Bloglovin’ (with the link at the top of this post). I am bereft at the loss of Google Reader, but we will blog on!


Follow my blog with Bloglovin

Pisces baby quilt

If you follow me on instagram you’re probably bored of me teasing you with pictures of this quilt buuuut it’s all done now so here it is with our resident newborn model, Kermit the Frog!

salt water constellations quilt 1

I put Kermit on it for scale so you can see that I accidentally made it totally massive (42 x 52 inches). Oh well, the baby can use it until it’s old enough for sleepovers, plus it’s a nice size for using as a lap quilt on the sofa (as I discovered when I was hand finishing the binding in front of the TV this week!).

salt water constellations quilt 8

This quilt is for the same baby that got those little trousers a few weeks ago. The baby will be a Pisces like me, so (even though I don’t really believe in horoscopes), I thought this mix of sea on the front and stars would on the back would suit the little one. The salt water fabrics that I used for the top are so much fun, with all manner of sea creatures (and submarines!) hiding in the patterns.salt water constellations quilt 7

I made up the pattern on the top as I went along. It was nice to take a lot more risks with quilt, compared to the last baby quilt I made where I was quite “safe” with my fabric choices and the pattern. I started from the top with full stripes of all the different fabrics, and then worked in strips down from there, epiecing the fabrics together. I started with some bits precut, but in the end I was just cutting the fabric and playing with it like a jigsaw and then sewing it together. It was fun! One thing I learnt was that some of the fabrics that I wasn’t that fond of when they arrived (like the stripes), actually looked sooo good once they were cut up into little pieces and up against other patterns.

salt water constellations quilt 9

I ordered the fabrics online and when the arrived I was a bit worried that the two different hues of blue on the front and back didn’t really go…. But once it the top was all sewn up I took into into my local quilt shop with the backing fabric and spent my lunch break browsing fabrics. Once I found this beautiful yellow the two blues really started to sing and I fell in love.

salt water constellations quilt 4

Here’s one of my favourite bits! I had this seagull ribbon in my stash and at first I just sewed it into the binding, but then I figured it would be nice to reinforce it so that the baby’s mum (my friend) could use it to hang the quilt up on a hook if need be.

salt water constellations quilt 5

Here’s a better view of the backing fabric with all its funny constellations. I quilted it with a triple zig zag stitch on my machine for some more wavy-ness. I wasn’t thrilled with the way this turned out (I have got to figure out how to work the walking foot I got for Christmas!), but I think it works.

20130306-202054.jpg

I attached the binding using the machine for one side and then secretly hand stitching on the other. I did all this using yellow thread that matched the binding, but as I was doing the hand stitching, I realised that I should have matched the machine thread to the quilt not the binding, so that it would be less visible if any bits did stick out of the binding.

salt water constellations quilt 2

Materials:

Front: six skinny quarters of various Salt Water by Tula Pink fabrics in the ‘aqua’ colourway from the Village Haberdashery (I emailled Annie the shop owner and she cut them skinny not fat for me so that I could do the long stripes at one end of the quilt).

Back: 1.5 metres of Lizzy House constellations night blue from Backstitch (this was the harrrdest blue to photograph ever but look at the gorgeous pattern!)

Binding: about half a metre of Kona Solids mustard yellow (I think! It doesn’t look like any of the swatches online but what does that mean?!)

Batting: Bamboo Blend 50/50 bamboo cotton batting (I bought this off a roll at my local quilt shop though).

(I really like this batting! It’s snuggly and warm but still folds up really well so the quilt isn’t too much of a behemoth. I think the technical terms to describe it are: high drapability, low loft and high resilience. The lady in the shop said it wasn’t really necessary to pre-wash it before use (unless you were making a very pale quilt – the washing is recommended to remove any traces of oil from any cottonseed husks left in the batting). It will shrink about 5 per cent in the wash for that wrinkly look.)

Time: Started after work last Wednesday, finished Tuesday lunchtime. Two solid evenings and a Saturday morning, the rest in bits and pieces.

Cost: quilt top £24 (I have scraps left over but nothing else), quilt back £18, binding £3.50 (I used half a metre of £7/metre fabric), batting £8.10 (1.5 metres of the baby quilt width). Total = £56.50 (Plus p&p on some items and three – count ‘em! – three 100m spools of gutermann thread at £1.55 a pop) (two blue and one yellow) (I only finished one of those fully though)

(I put the time and cost just to show why custom quilts cost so much on places like Etsy and why I won’t be going into business any time soon! I also thinking quilting cottons might be more expensive in the UK than the US?)

My favourite quilting tutorials: All linked up in this blog post

Let’s finish this up with one more picture of our beautiful baby all wrapped up!

salt water constellations quilt 6

I love making quilts for babies! I spent a lot of time while I was making this quilt, just thinking about this little baby that we’re all so excited to meet. One of my other friends said that maybe I should be careful of setting a precedent that everyone’s babies get quilts, but for now I’d rather work on getting faster at quilting than give up on giving them! (Ask me again in a few years though.)

Baby trousers! (Winter Pinterest Challenge)

Here’s a short and sweet post for a short and sweet project.

 Rae's basic newborn baby pant lined

Kermit loves modelling, and he’s so good at it too.

The first of my close friends is due next month and we are all SO EXCITED, yet also a little unprepared because we’ve never done this before! I plan on making the baby a baby quilt, but when one of her friends organised her a last minute baby shower dinner thing, I wanted a quick project to give her (the quilt won’t be finished till the baby is born).


So I turned to my pins and found this lovely free pattern from Made by Rae and got to serging (oh yeah! I did all the guts of these on my new overlocker). I was going to just make them unlined in this black and white elephant fabric, buuuut then after cutting them out and sewing them up, I realised I had cut the elephants out upside down. Ruh-roh.

So I pulled out my copy of Anna Maria Horner’s Handmade Beginnings and copied the construction of her quick change trousers to make a these into lined pair of trousers.

To do this, you make two identical pairs of trousers and sew everything except the waistband and leg openings. Then slip one pair into the other, right sides facing. Sew a seam along the top of both pairs of trousers. Turn inside out, then top stitch about half an inch under the waist band, leaving a small opening to slip quarter inch elastic through. Thread the elastic through and then zig zag stitch the ends of the elastic together and complete the top stitching so it looks all nice. I didn’t take any pictures of this but thankfully I used horribly clashing thread for the top stitching so you should be able to figure it out…. Once you’ve turn that, turn all four leg openings up quarter of an inch with the iron and top stitch all the way around. You’re done!

 Rae's basic newborn baby pant lined

And those upside down elephants on the inside? Perfect turn ups!

This post is part of the Pinterest Challenge, organised by Katie (Bower Power), Sherry (Young House Love), Michelle (Decor and the Dog), and Megan (The Remodeled Life).

Thanks guys!