Hello! I’ve been blown over by the response to my post about our lace window treatment made with cornflour. Thanks everyone!

I thought I’d pop in with the answers to come of the common questions from the comments section.
Q: Just how opaque is it? I am curious how much privacy this actually allows.
A: I’d say it totally depends on your fabric. If you’d be happy with getting changed behind the fabric as curtains then the fabric will be opaque enough for this window treatment too. I actually have lace curtains in this same fabric, and in both instances I feel happy getting changed behind them if it’s light outside, but I wouldn’t hang out without my clothes on with the light on if it was dark outside. So if privacy is really important, just pick a lace that is more opaque than sheer.
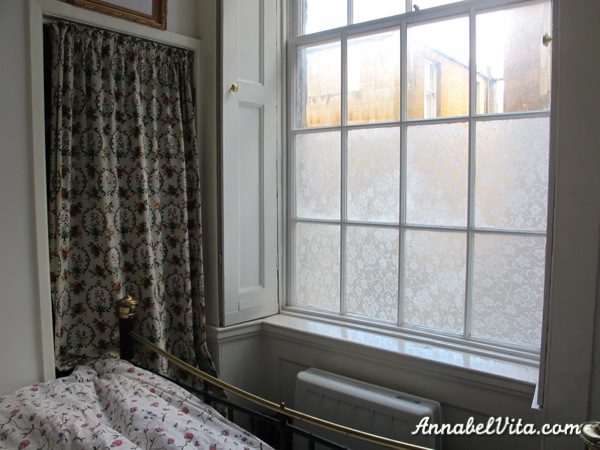
It also depends how directly other people can look into your window! Our bedroom window isn’t super overlooked, although there’s lots of windows out the back, most of the angles are indirect and/or the other window is frosted.
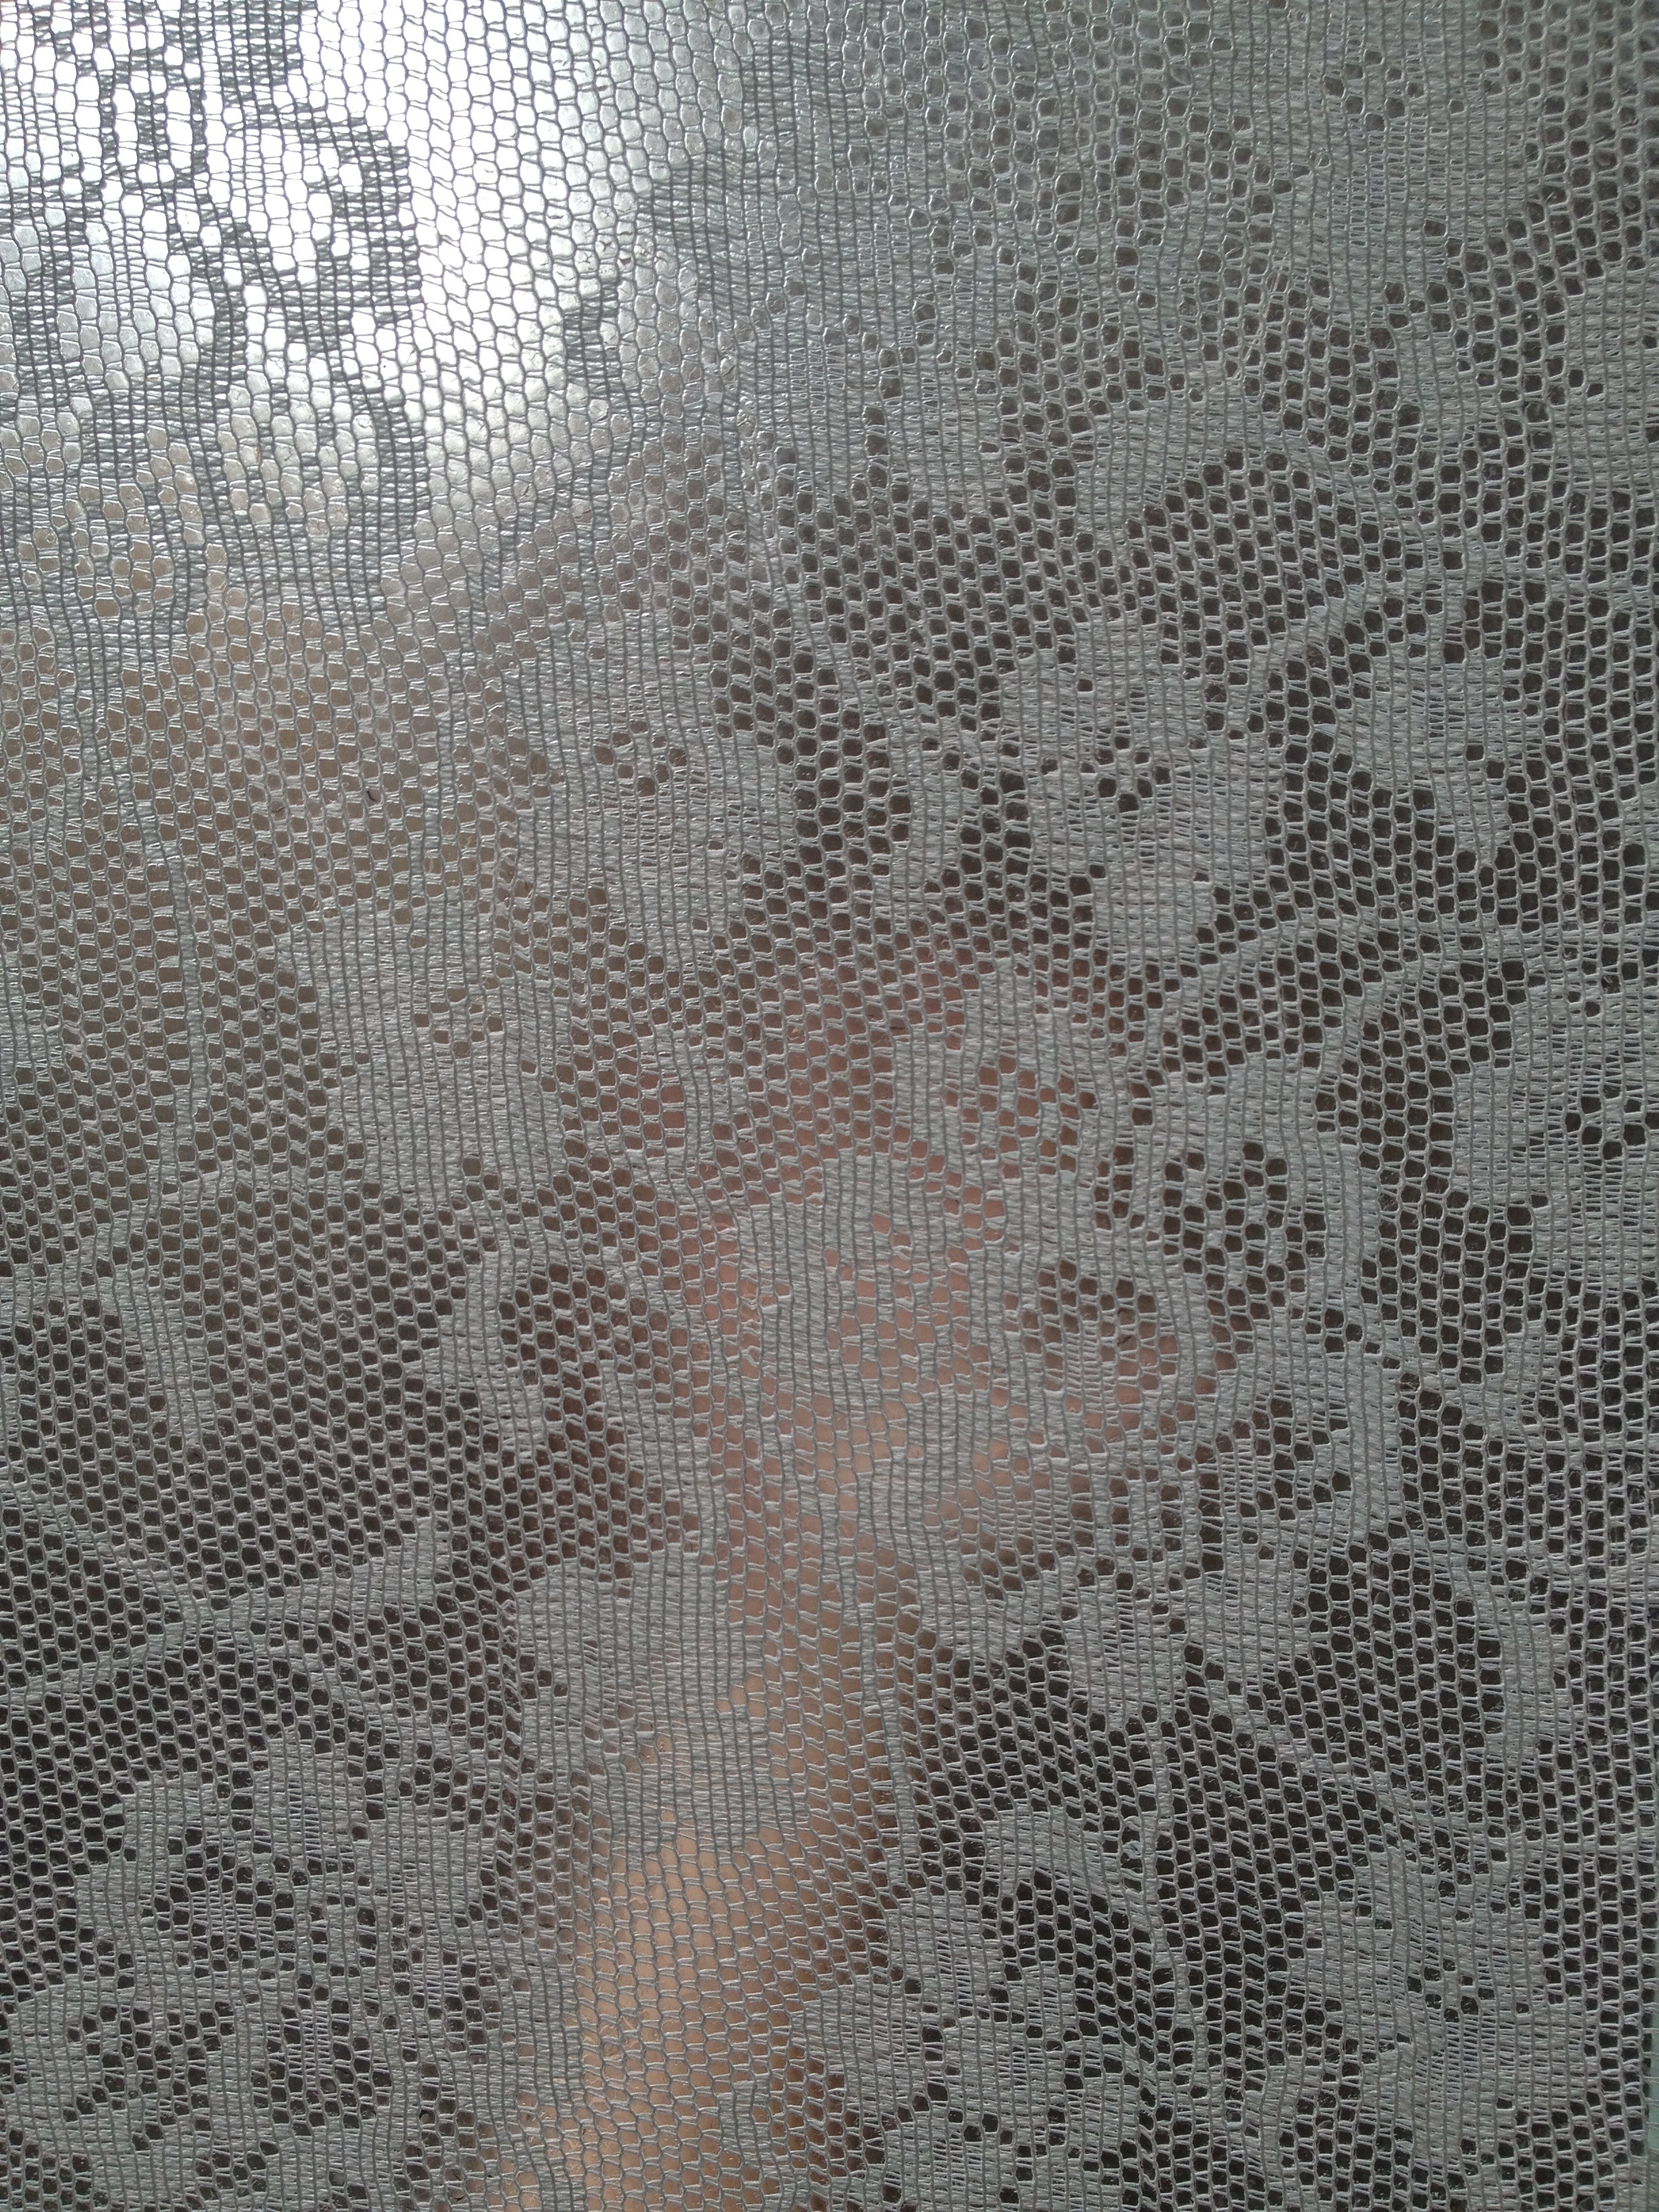
Here’s some pictures (I had to stick my had out of the window to demonstrate as we couldn’t take a pic from outside!) to give you a better idea (remember, a thicker lace would give you more coverage).
This spooky picture is my hand pressed right up against the glass…

And this one is my slightly stubby arm reach out as far as it can, you can just make out my fingers.
Ok! Other questions…
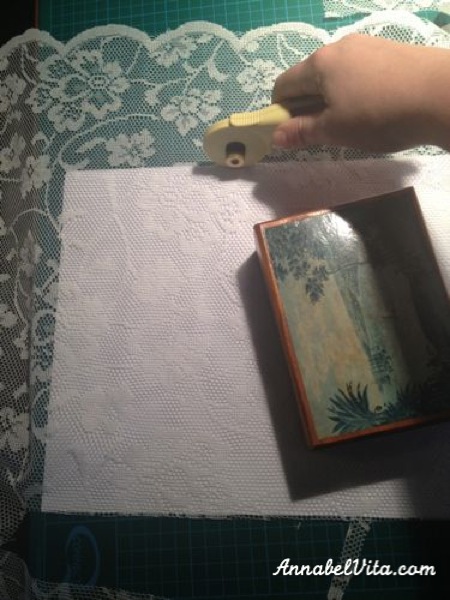
Q: I’m interested in knowing a little more about the mixture. So it’s however much corn starch I want and match it with equal water and then boil the mix
A: You make a paste with equal parts cornstarch/cornflour and hot water and then add extra boiling water. In my case it was two tablespoons cornflour and two tablespoons water to start with and then I mixed in a cup and a half of boiled water from the kettle.
Q: What about mod podge? Would that work as well?
A: We don’t really have modge podge here so I don’t know! It would be a bit more permanent I imagine. If it’s anything like PVA glue (I think it is) then I wouldn’t want to use it on wooden painted windows like we have, but it could work great on more modern windows. It would also be much more expensive. (The “glue” made out of cornstarch is essentially free!)
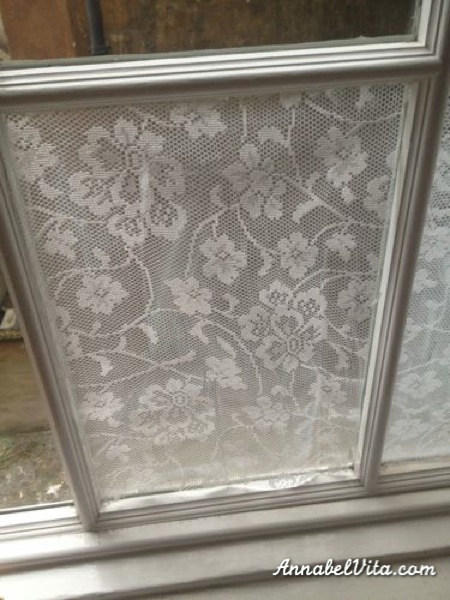
Q: If I used colored lace would the cornstarch show?
A: No, it dries totally clear (but goes on gloopy and white-ish, don’t panic!) It will probably go clear overnight.
Q: Can I see a picture from the outside.
A: Sadly this isn’t possibly in our flat, but Michal did this window treatment in her gorgeous over the door window and put up some pictures on her blog. It looks amazing!

Picture from sweetwoodfuffs.blogspot.com
It’s well worth popping by her blog to see how pretty this looks from the inside, too.
If anyone else has any other questions, please feel free to ask away! (Either here or in the original blog post.)